Create a Bucket
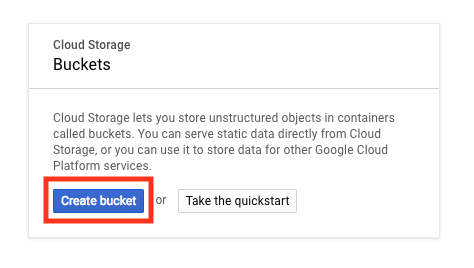
In the Console, go to Navigation menu > Storage > Browser. Click Create Bucket:
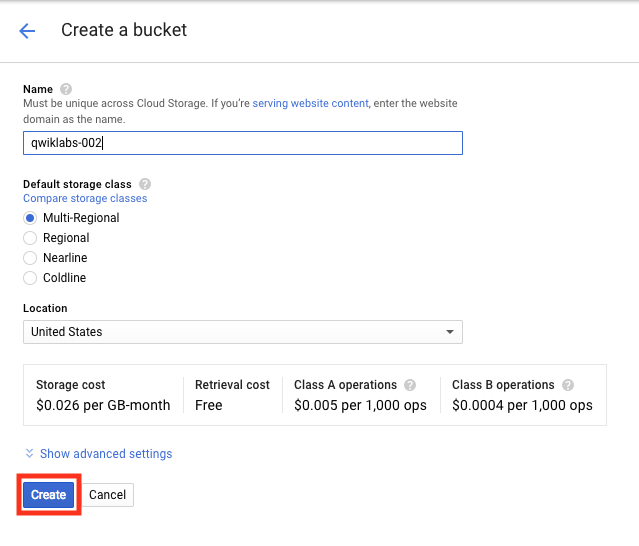
Name: Enter a unique name for your bucket.
Bucket naming rules:
- Do not include sensitive information in the bucket name, because the bucket namespace is global and publicly visible.
- Bucket names must contain only lowercase letters, numbers, dashes (-), underscores (_), and dots (.). Names containing dots require verification.
- Bucket names must start and end with a number or letter.
- Bucket names must contain 3 to 63 characters. Names containing dots can contain up to 222 characters, but each dot-separated component can be no longer than 63 characters.
- Bucket names cannot be represented as an IP address in dotted-decimal notation (for example, 192.168.5.4).
- Bucket names cannot begin with the "goog" prefix.
- Bucket names cannot contain "google" or close misspellings of "google".
- Also, for DNS compliance and future compatibility, you should not use underscores (_) or have a period adjacent to another period or dash. For example, ".." or "-." or ".-" are not valid in DNS names.
Storage class: Multi-Regional
Location: United States
Once you've gotten your bucket configured, click Create:
That's it — you've just created a Cloud Storage bucket!
Upload an Object into the Bucket
In this section, you add an object to your bucket. For this lab the object is an image.
- Get an image. Click this link to an portrait of Ada Lovelace and save the image to your local computer.
- The Bucket details screen should still be open. Drag the portrait of Ada Lovelace to the Drop files here area of the Bucket details screen.
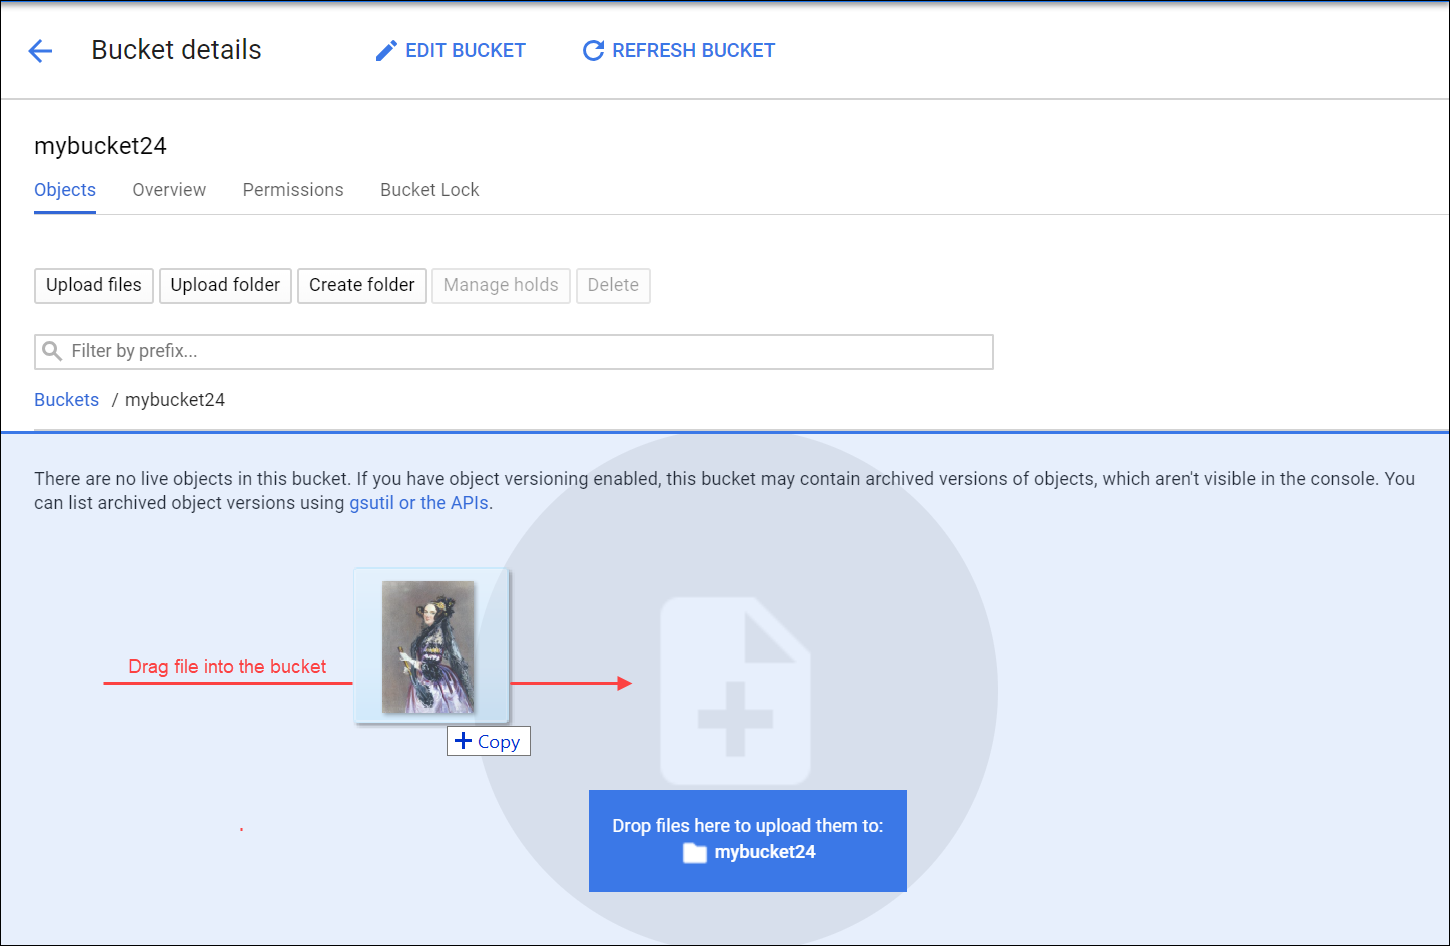
You should see the image listed in the Buckets list.
- Delete the image in the bucket. Check the box next to the filename then click Delete, and then click Delete again to confirm in the Delete selected file? dialog.
- Upload the image again, this time click Upload files.
- Navigate to the image on your local computer, and then click Open.
You should see the image listed in the Buckets list.
- Rename the file. Click on the drop-down menu (three vertical dots) on the far right on the image row and select Rename.
- Update the file name to "ada.jpg" and click RENAME.
You should now see one file,
ada.jpg, in your bucket.Test Completed Task
Click Check my progress to verify your performed task. If you have successfully uploaded object in your bucket, you will see an assessment score.
Test your Understanding
Below are a multiple choice questions to reinforce your understanding of this lab's concepts. Answer them to the best of your abilities.
Share an Object Publicly
To create a publicly accessible URL for the object, click the drop-down menu (three vertical dots).
Select Edit permissions from the drop-down menu.
In the dialog that appears, click the + Add item button.
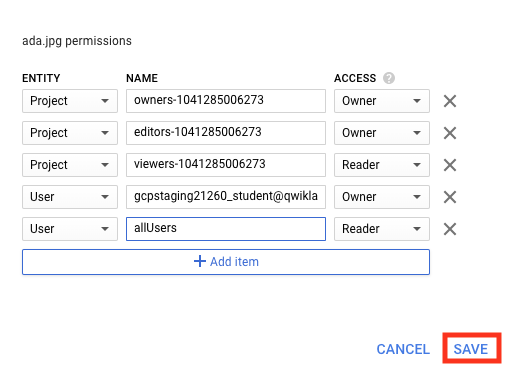
Add a permission for all users by entering in the following:
- Select User for the Entity.
- Enter allUsers for the Name.
- Select Reader for the Access.
Then click Save:
Once shared publicly, a link icon will appear in the public access column—click the link to open the file in a new tab.
Create Folders
In this section you create a folder.
- Click the "Create Folder" link near the top of the page.
- Name the folder
folder1, then click Create.
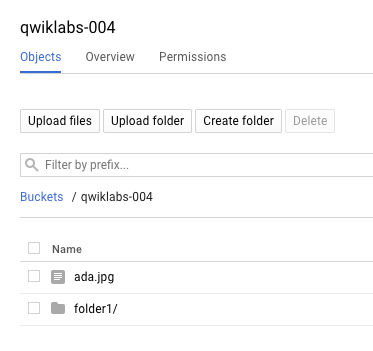
You should see the folder in the bucket with a folder icon to distinguish it from objects:
Create a subfolder
Now you'll create a folder inside
folder1 and upload a file to it.- Click on folder1, then click "Create Folder" near the top of the page.
- Name the folder
folder2then click Create. - Drag the portrait of Ada Lovelace from your local computer and drop it into the Drop files here area.
After the file uploads, you see it listed in the subfolder in the bucket.
- Rename the file to "ada.jpg".
- To create a publicly accessible URL for the object, click the drop-down menu (three vertical dots) on the far right of the
ada.jpgobject. - Select Edit permissions from the drop-down menu.
- In the dialog that appears, click the + Add item button.
- Add a permission for all users by entering in the following:
- Select User for the Entity.
- Enter allUsers for the Name.
- Select Reader for the Access.
- Then click Save:

Once shared publicly, a link icon will appear in the public access column—click the link to open the file in a new tab.
Delete a folder
In this section you remove
folder1 and its contents from your bucket.- Navigate back to Buckets/[YOUR_BUCKET]. You should see
folder1listed in the bucket contents list. - Check the box next to the Name, folder1 and click Delete, and then click Deleteagain when prompted to confirm.
folder1 and its contents are no longer in your bucket.
沒有留言:
張貼留言